Day 2 in the Books...Two More to Go!

After another trip to the boat to do a little work I am reminded that some work is more exciting than others. As we continue to inch closer and closer to getting this old Catalina 25 out of the slip and dancing on the waves with the wind in her sails...today is one of those not so exciting, or sexy, days of boat projects.
You may remember or you may not...there really isn't any reason you would...but last I month came up with a plan to finish the necessary boat projects required for us to go sailing. (And to sail so legally!) In my boat notebook I titled this plan, "Operation Fix-A-Boat". It is a plan to finish the necessary projects in 4 day-trips to the boat. Here is a basic outline of the plan...
- Day 1 would be projects I could pretty easily take care of myself.
- Day 2 would be dedicated to the outboard...getting it cranked, replacing lower-unit oil, etc...
- Day 3 would be focused on the roller furling...replacing the halyard, tightening the forestay, etc...
- Day 4 would be tackling replacing the steaming light on the mast and dealing with the marine head
Now, I would say we are still on track...sort of. The first day of planned projects came and went without a whole lot of issues and it has been checked off the list. Since I want to bring the outboard home to do some maintenance on it, that Day 2 has been postponed. Day 3 (which I completed today), which is dedicated to all things related to the roller furler, was actually accomplished over 2 half-days of working because of our schedule.
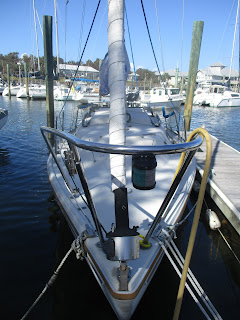
The Monday after Easter I spent the morning replacing the internal halyard of the CDI roller furler. I was able to accomplish this without taking the mast down...which I was so excited about. If you would like to read about that, here is the link to that blog post. Replacing CDI Roller Furler Internal Halyard Blog post.

Due to the wind this past Monday I was not able to bend on (attach) the sail. So, that was tops on the to-do-list for today. This was pretty straight forward and only required one re-do. This was accomplished in five "easy steps". First, I had to re-attach the furling line to the furler (this line is used to roll the front sail back up). Second, I hoisted the genoa (front sail). This only had to be re-done once. You see, I tied the end of the new halyard to the head of the sail and raised it up while feeding it into the luff of the roller fuler. The problem was that the halyard was too long and because of the way it was made it could only be raised so far. So...I lowered the sail, retied the halyard, and rehoisted it. BINGO! Perfect. The third step was to tie off the halyard to the shackle on the roller furler so the sail would not slide down to the deck. Fourth, it was time to attach the tack (lower front part of the sail that attaches to the boat) to the furler drum so the bottom of it does not ride up when filled with wind. Then, at last, it was time to furl (roll) the sail up around the roller furler. Remember that furling line I reattached earlier? Yep...I got to test it and it worked perfectly. And that...my friends...brought the major part of the projects for Day 2 to completion.

What else was on tap? Two pretty simple projects. The first was pretty much as simple as sticking a piece of tape to something. While there is a light near the galley of the boat, it is very difficult to get to and actually does not through very good light onto the stove. So, I picked up an LED light that operates on 3 AAA batteries from Harbor Freight. It attaches using...sticky tape. Just what I needed...a simple project!

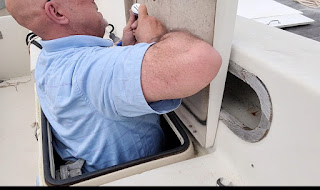
The day ended with a pretty simple project that will help me get ready for working on the motor. Trying to lift an outboard motor that weights nearly 90 pounds off the back of a sailboat certainly seems to carry the risk of it becoming an 8 hp anchor. So, not wanting to drop it into the water when I go to remove it, I made a harness that I can attach to the motor and then one of the halyards from the top of the mast. This will then be used to assist in lifting the motor of the back of the boat and onto the dock. (Of course, it is still a 2-person job!) This harness is made out of 1" webbing. It was pretty simple really...I tied a loop in one end...held that loop on top of the motor, while I ran the webbing around the lower back of the motor powerhead then up through the loop that was still on top of the motor...this continued by running the webbing around the lower front of the motor powerhead and back up through the loop on top of the motor...I then tied another loop, on the free end, where he shackle will attach to this loop in order to aid in lifting the motor.

Well, none of these projects are earth shaking or life changing...but once again they are necessary in this journey from dock to sailing. So...two days down and two to go!

Comments
Post a Comment