Failed Plan...But New Halyard Installed!

We all have times...and things...that weigh on our minds. You may even say they create a certain amount of stress. Now, I'm not talking about life changing types of decisions or things that will actually make a difference in the world...I'm talking about those projects that creep up in life whether in your home, for your car, or in this case on your boat. One necessary project that has been waiting for me on the boat is replacing the halyard for the roller furler. Without it, we would be left sailing with only one sail.
What is a roller furler? Well, a sloop rigged sailboat has two sails...the main sail and the foresail. The foresail could be a jib or a genoa. Basically, a genoa is larger and overlaps the mast. I guess I would say that traditionally the foresail was hanked on...it was "clipped" on to the forestay. The forestay is a wire the connects to the bow of the boat and helps hold the mast up. Take a look at the picture at the top of this post. Notice that the front sail (foresail) is wrapped around the forestay. A roller furler basically enables you to roll the foresail around the forestay. So, rather than removing the sail after a day of sailing, you roll it up and it is out of the way. The roller furler also allows you to adjust the size of the sail by changing how much of it you pull out, or roll up. This makes it unnecessary to go to the bow of the boat and change out sails. It may have some adverse affect on sail shape but also makes life so much easier.
We have a 1983 Catalina 25 with a CDI roller furler. I'm not sure how old the roller furler is...but it is not a real recent model. In one of my many emails with the company they were unable to provide me a copy of the manual that would have come with it...it is that old. Well, on the CDI furler there is a "hard plastic" piece called a Luff Extrusion, that slides over the forestay. This extrusion is then able to rotate around the forestay so the sail can be rolled up...or out. On one side of this extrusion is a slot that the foresail slides into when raised. On the other side is a slot that an internal halyard rides in. To keep the halyard in this slot there is a small metal ferrule near one end. While this does its job well, it also makes it a little more difficult to remove and replace. And that...my friends...is why this is one of those projects that created a little stress in my life.
Many people (maybe most?) do this project by lowering the mast. But that is at least a little more difficult due to how the previous owner ran the electrical to the mast. So I needed to do this with the mast up...and I was hoping that it would not require me to climb to the tope of the mast to complete.
So, I came up with a plan. It was a good plan. It was a plan that lasted...until I started working on it! Despite my failed plan, this ended up not been too difficult. So, here is a step by step description of how I dodged a bullet and got it done.
First, I removed the luff support pin and furling line from the furler. Honestly, I'm not sure if I needed to remove either (I thought I did) but I did.

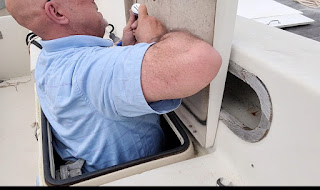
Second, I tied a loop of line around the drum. This line/loop was then attached to a halyard so I could lift the furler drum out of the furler cup. Once it was lifted I tied it off so the drum stayed "elevated". This allowed me to have some access to the bottom of the furler drum.


Sixth, I lowered the drum back into the cup and re-inserted the luff support pin.

Normally, I would have re-installed the furling line that I removed earlier and I even had hoped to raise and furled the sail. But two things worked against me. One the wind was really blowing so the thought of trying to deal with the sail quickly went out the window. Also, it was time for lunch and my stomach clock had long gone off! I know this wasn't a major project...but it sure did feel good to get it done.
Actually, you have no idea how happy I was to get it done!
Terrific. Thank you.
ReplyDelete